
How to edit a video in SceneMill
From a folder of clips to a finished video in ten steps. Every step works the way it is described here in the version you can download today.
Install SceneMill
Download the installer and run it. Windows may show a SmartScreen notice because the installer is not code-signed yet: choose “More info”, then “Run anyway”.
SceneMill needs no account. It keeps itself up to date: when a newer version exists, it tells you at start and installs it for you.
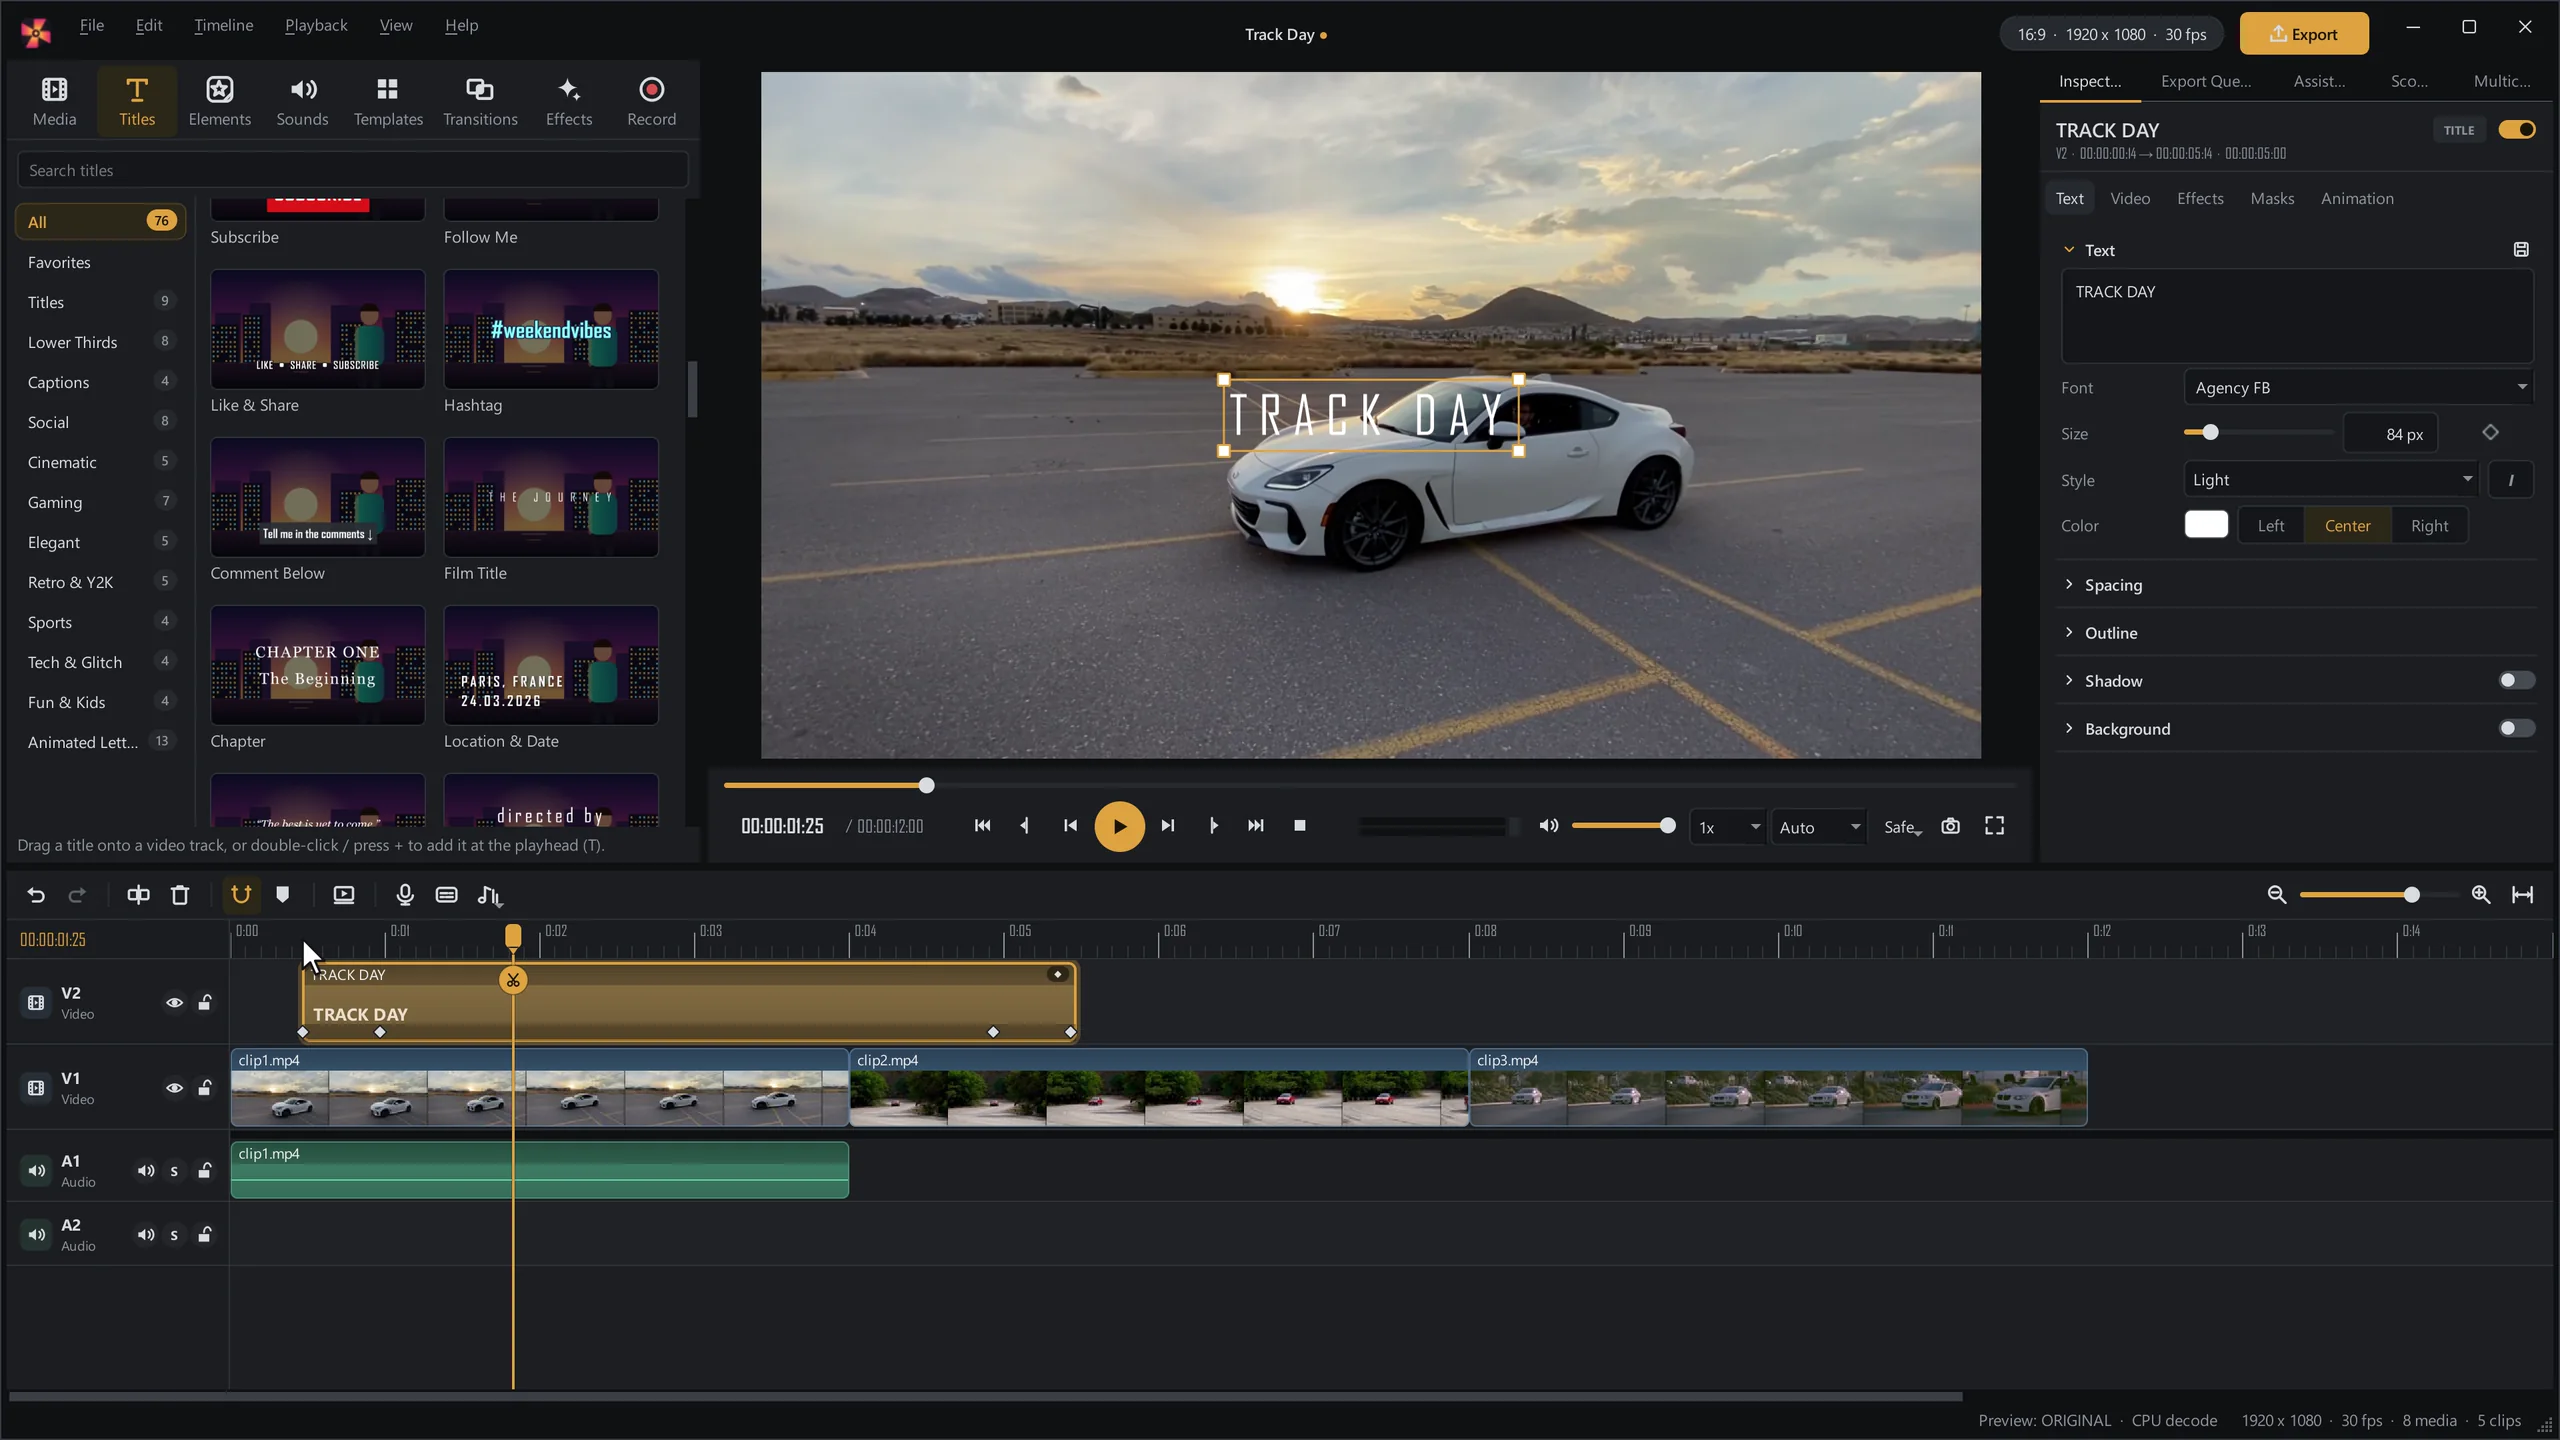
Bring in your footage
Open the Media tab and click Import (Ctrl + I), or drag files from Explorer into the window. Video, audio and pictures are all welcome; folders are read with everything inside.
- The library shows a thumbnail, length, size and frame rate for each file
- Search by name and filter by video, audio or pictures
- Your files stay where they are. SceneMill does not copy or change them
Build the timeline
Drag a clip from the library onto a track. Drop the next one behind it, or onto the track above to lay it over the first. Drag clips along the track to reorder them; they snap to cuts and to the playhead.
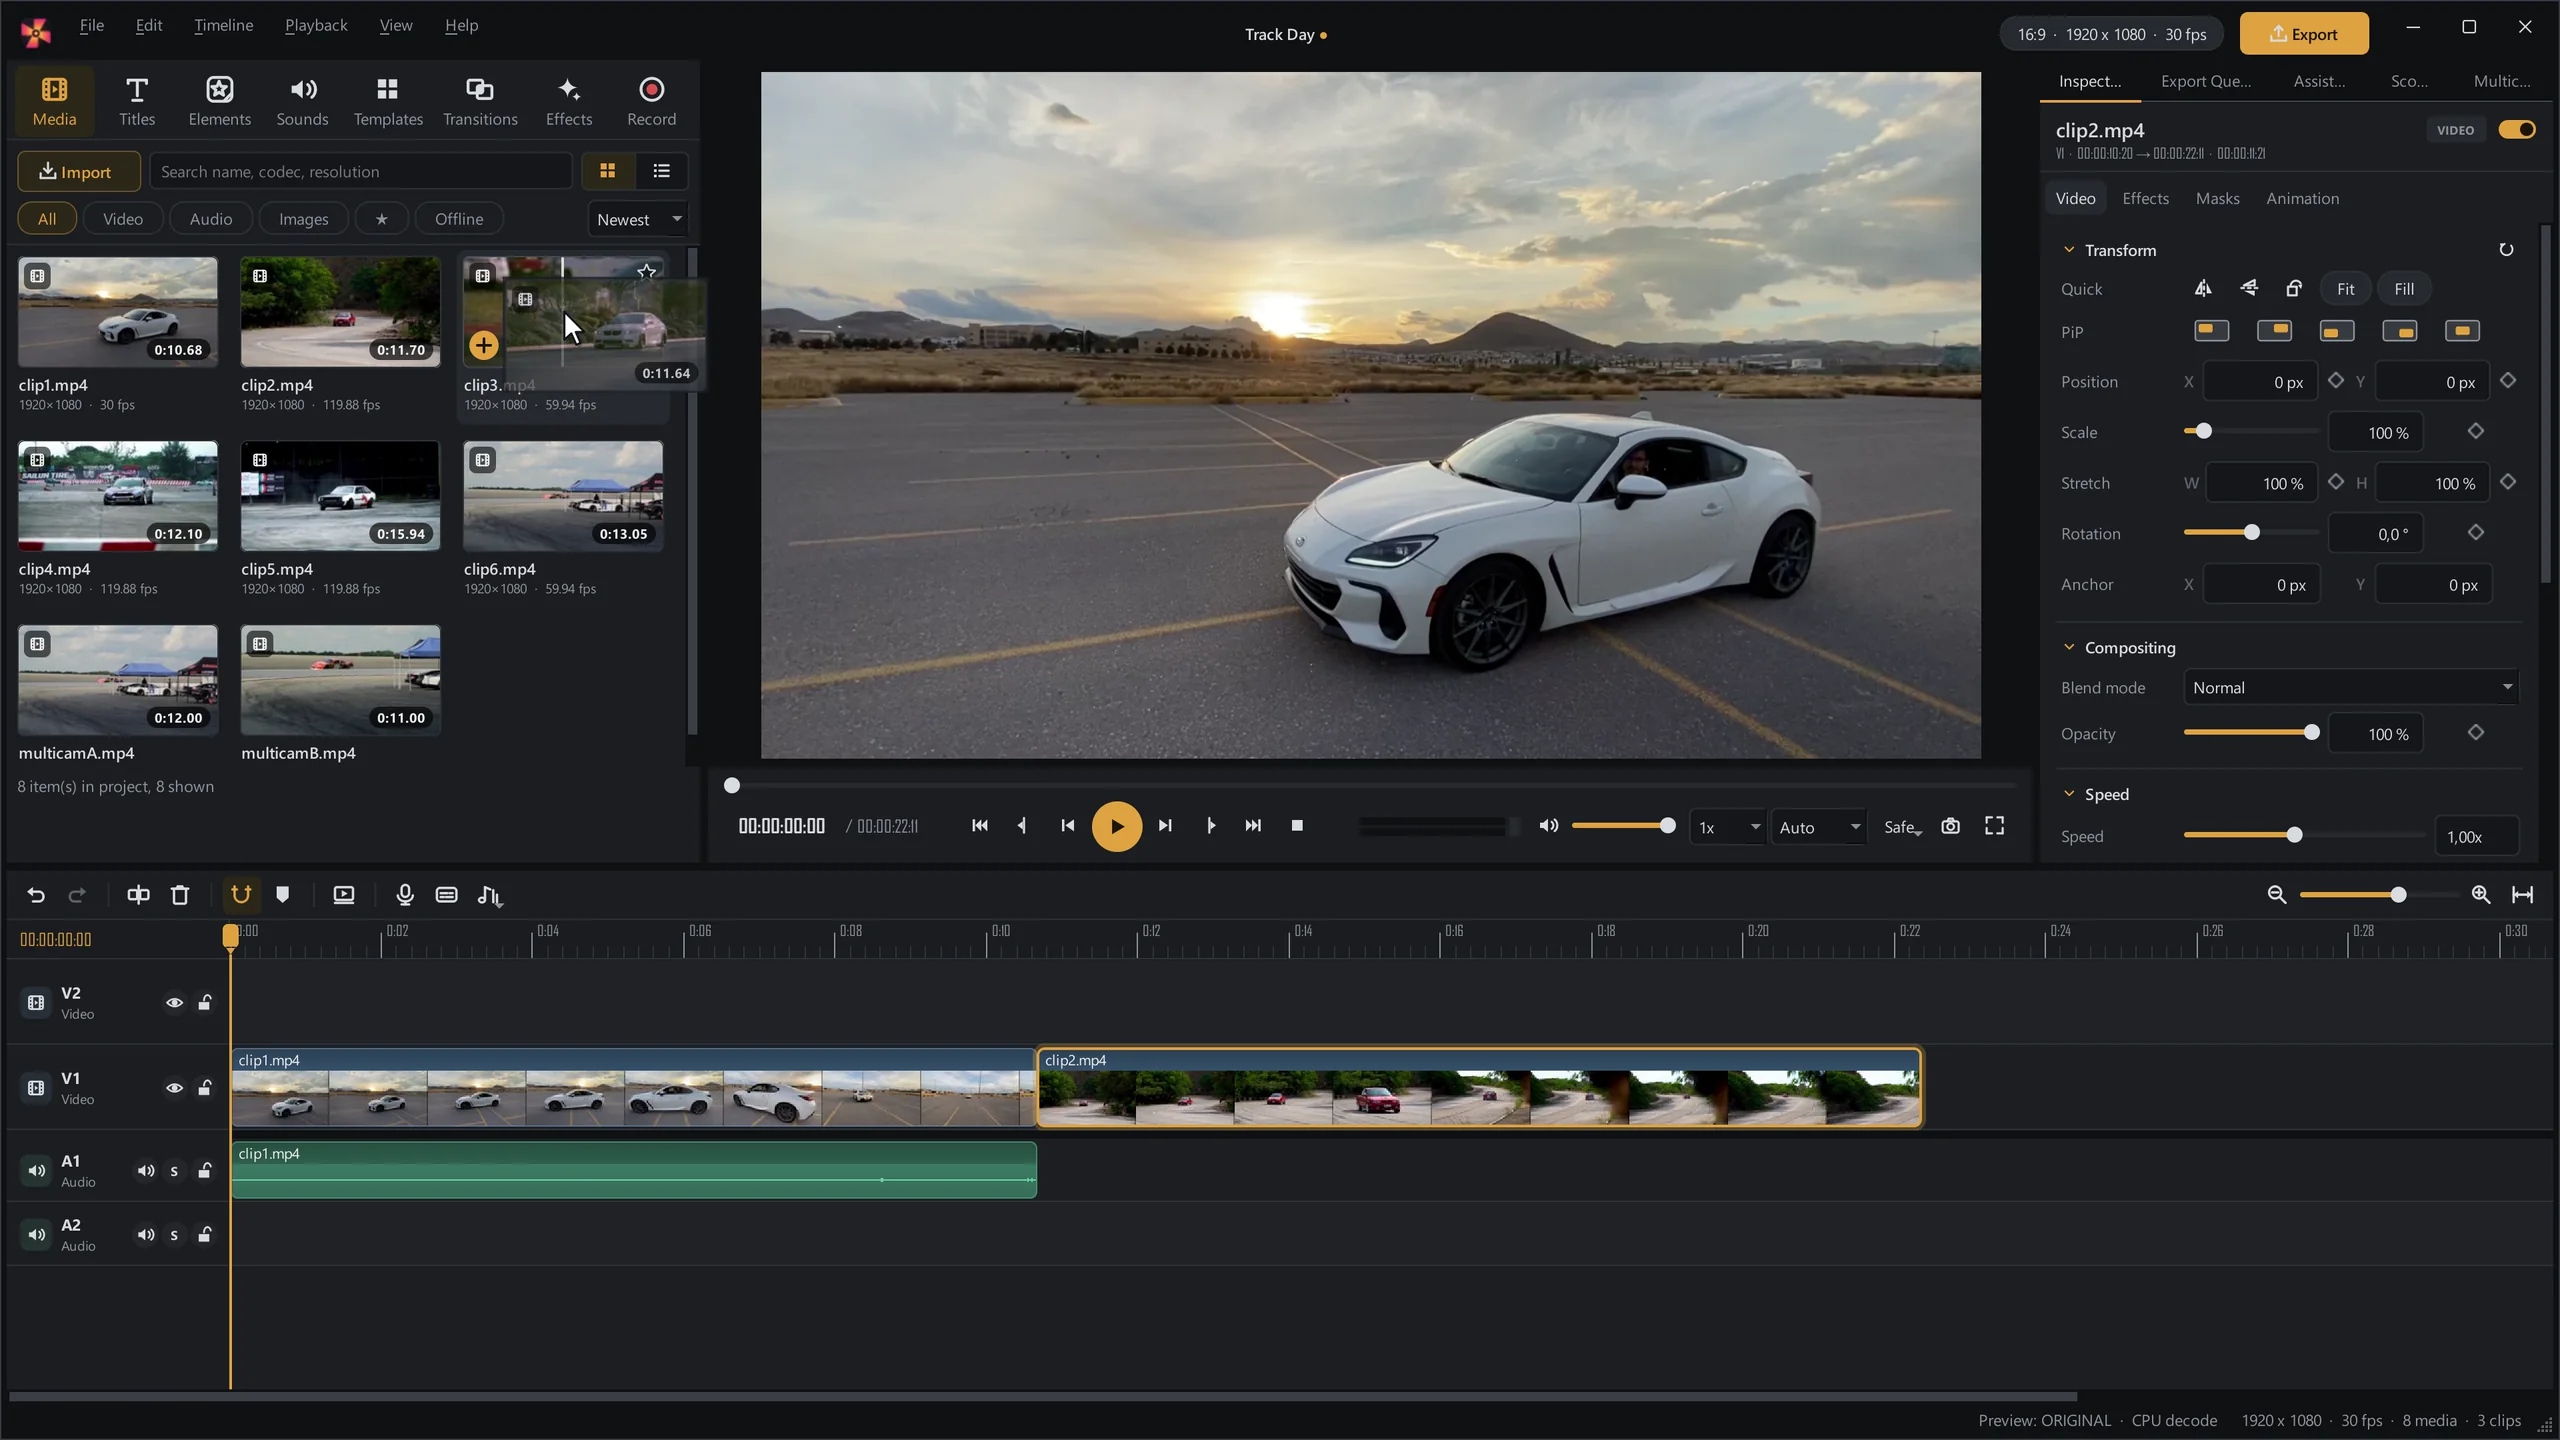
- = and - zoom the timeline, \ fits everything
- N switches snapping; hold Shift while dragging to switch it off for a moment
- Space plays and pauses
Cut and trim
Move the playhead to where the cut should be and press Ctrl + K (or click the scissors on the playhead). Select the part you do not want and press Delete; Shift + Delete also closes the gap. To trim, drag the edge of a clip.
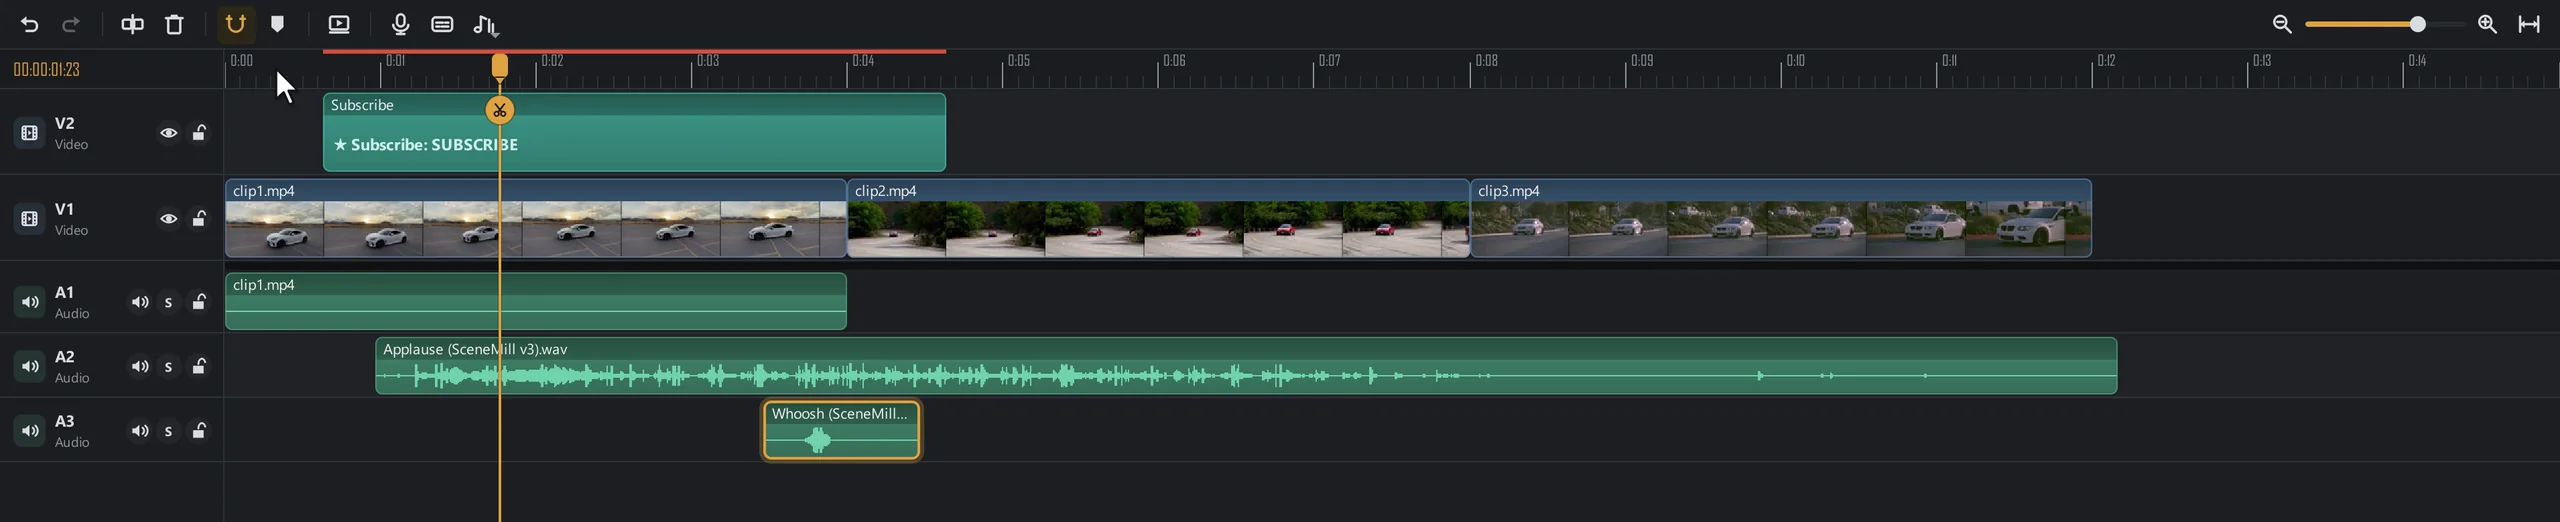
- ← → step one frame, ↑ ↓ jump to the previous and next cut
- J K L play backwards, pause, play forwards; press again for double speed
- Ctrl + Z takes back any step
Add a title
Open the Titles tab and drag a title onto a video track above your clip (or double-click it to add it at the playhead). Select it and type your own words in the inspector under Text. Font, size, color, outline, shadow and background are right below.
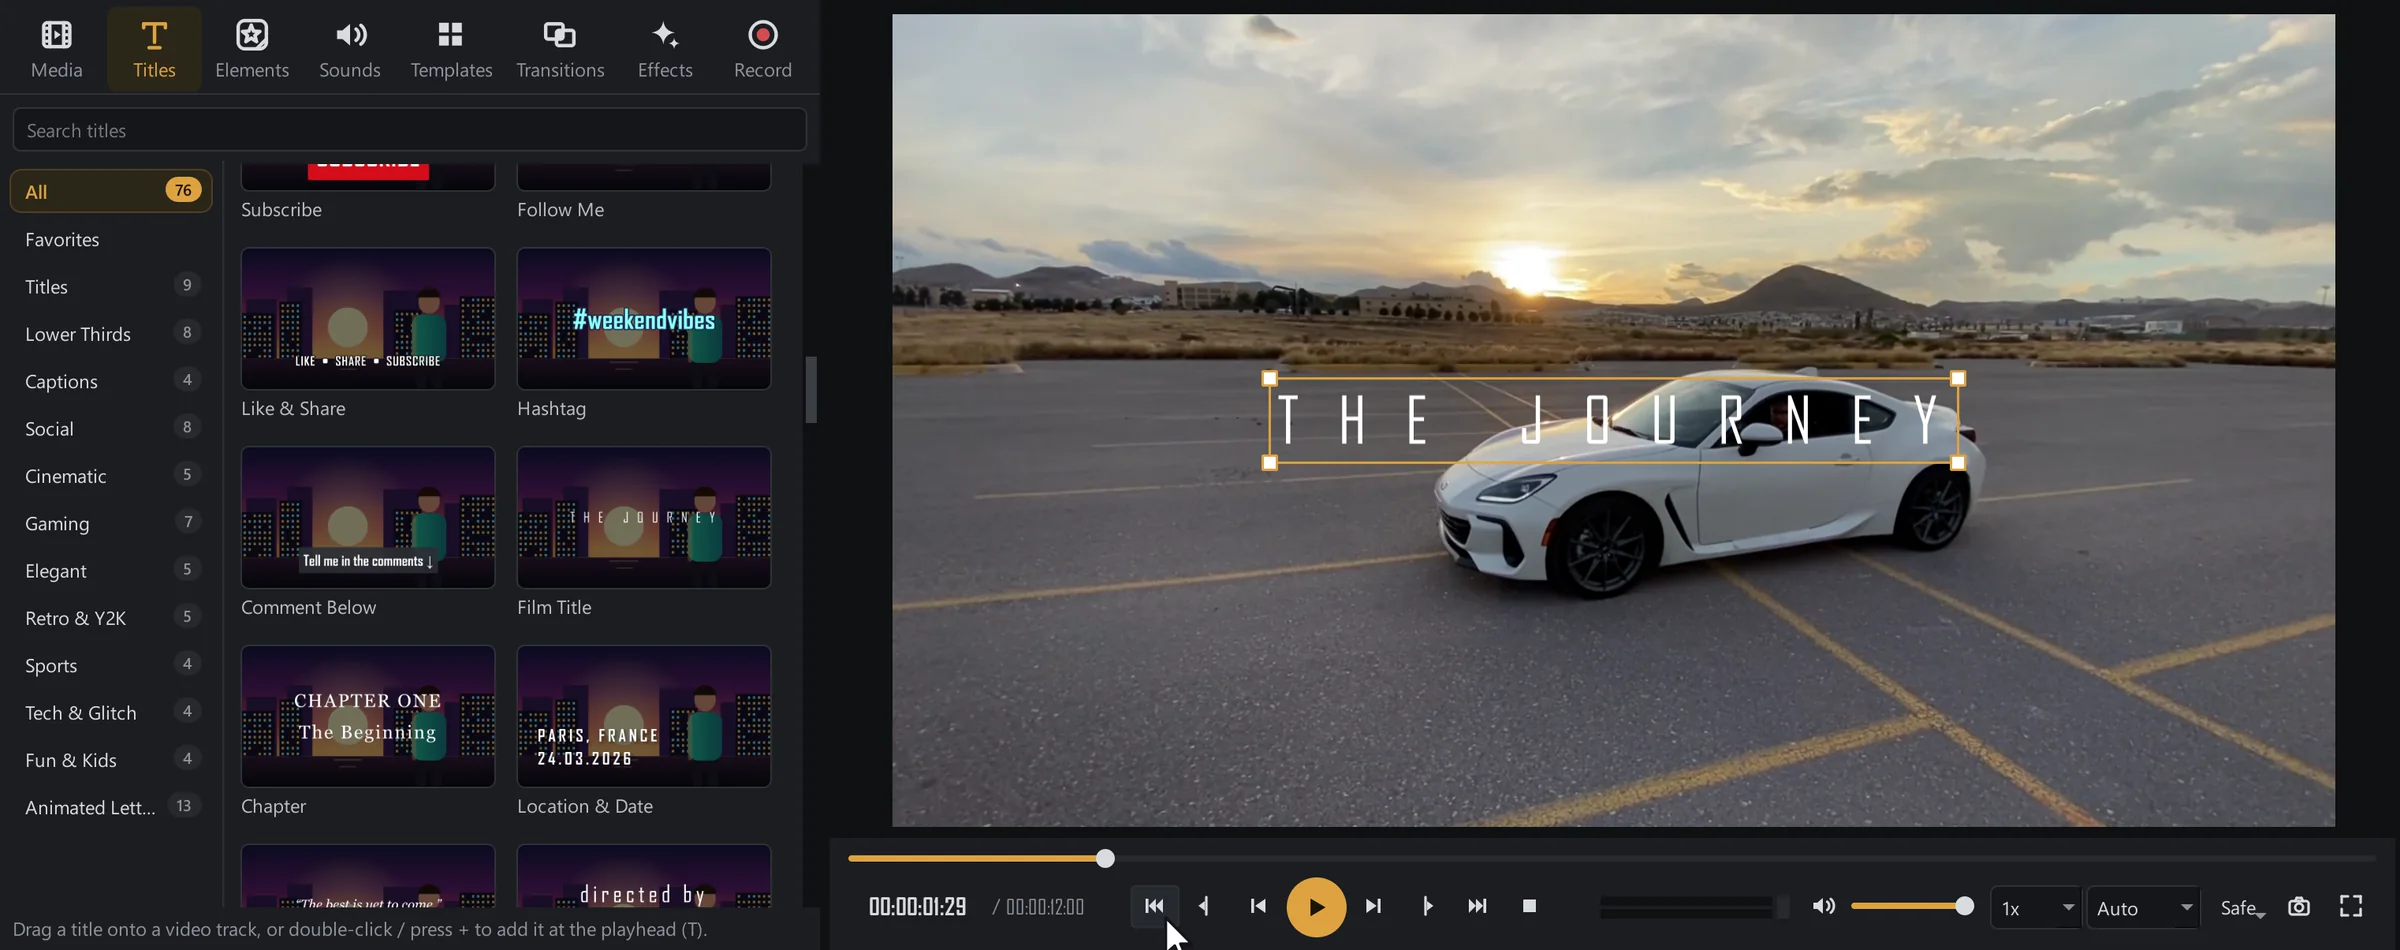
T adds a plain title at the playhead, Shift + T a subtitle.
Add transitions
Open the Transitions tab. Move the mouse over a transition to see it play, then drag it onto the cut between two clips that touch. Double-clicking adds it at the cut nearest to the playhead. Select the transition on the timeline to set its length.
Ctrl + D adds a simple cross dissolve at the nearest cut.
Effects and color
Open the Effects tab. Click an effect to preview it in the viewer, then drag it onto a clip or double-click it. Its sliders appear in the inspector under Effects, where you can also switch an effect off, reorder or remove it.
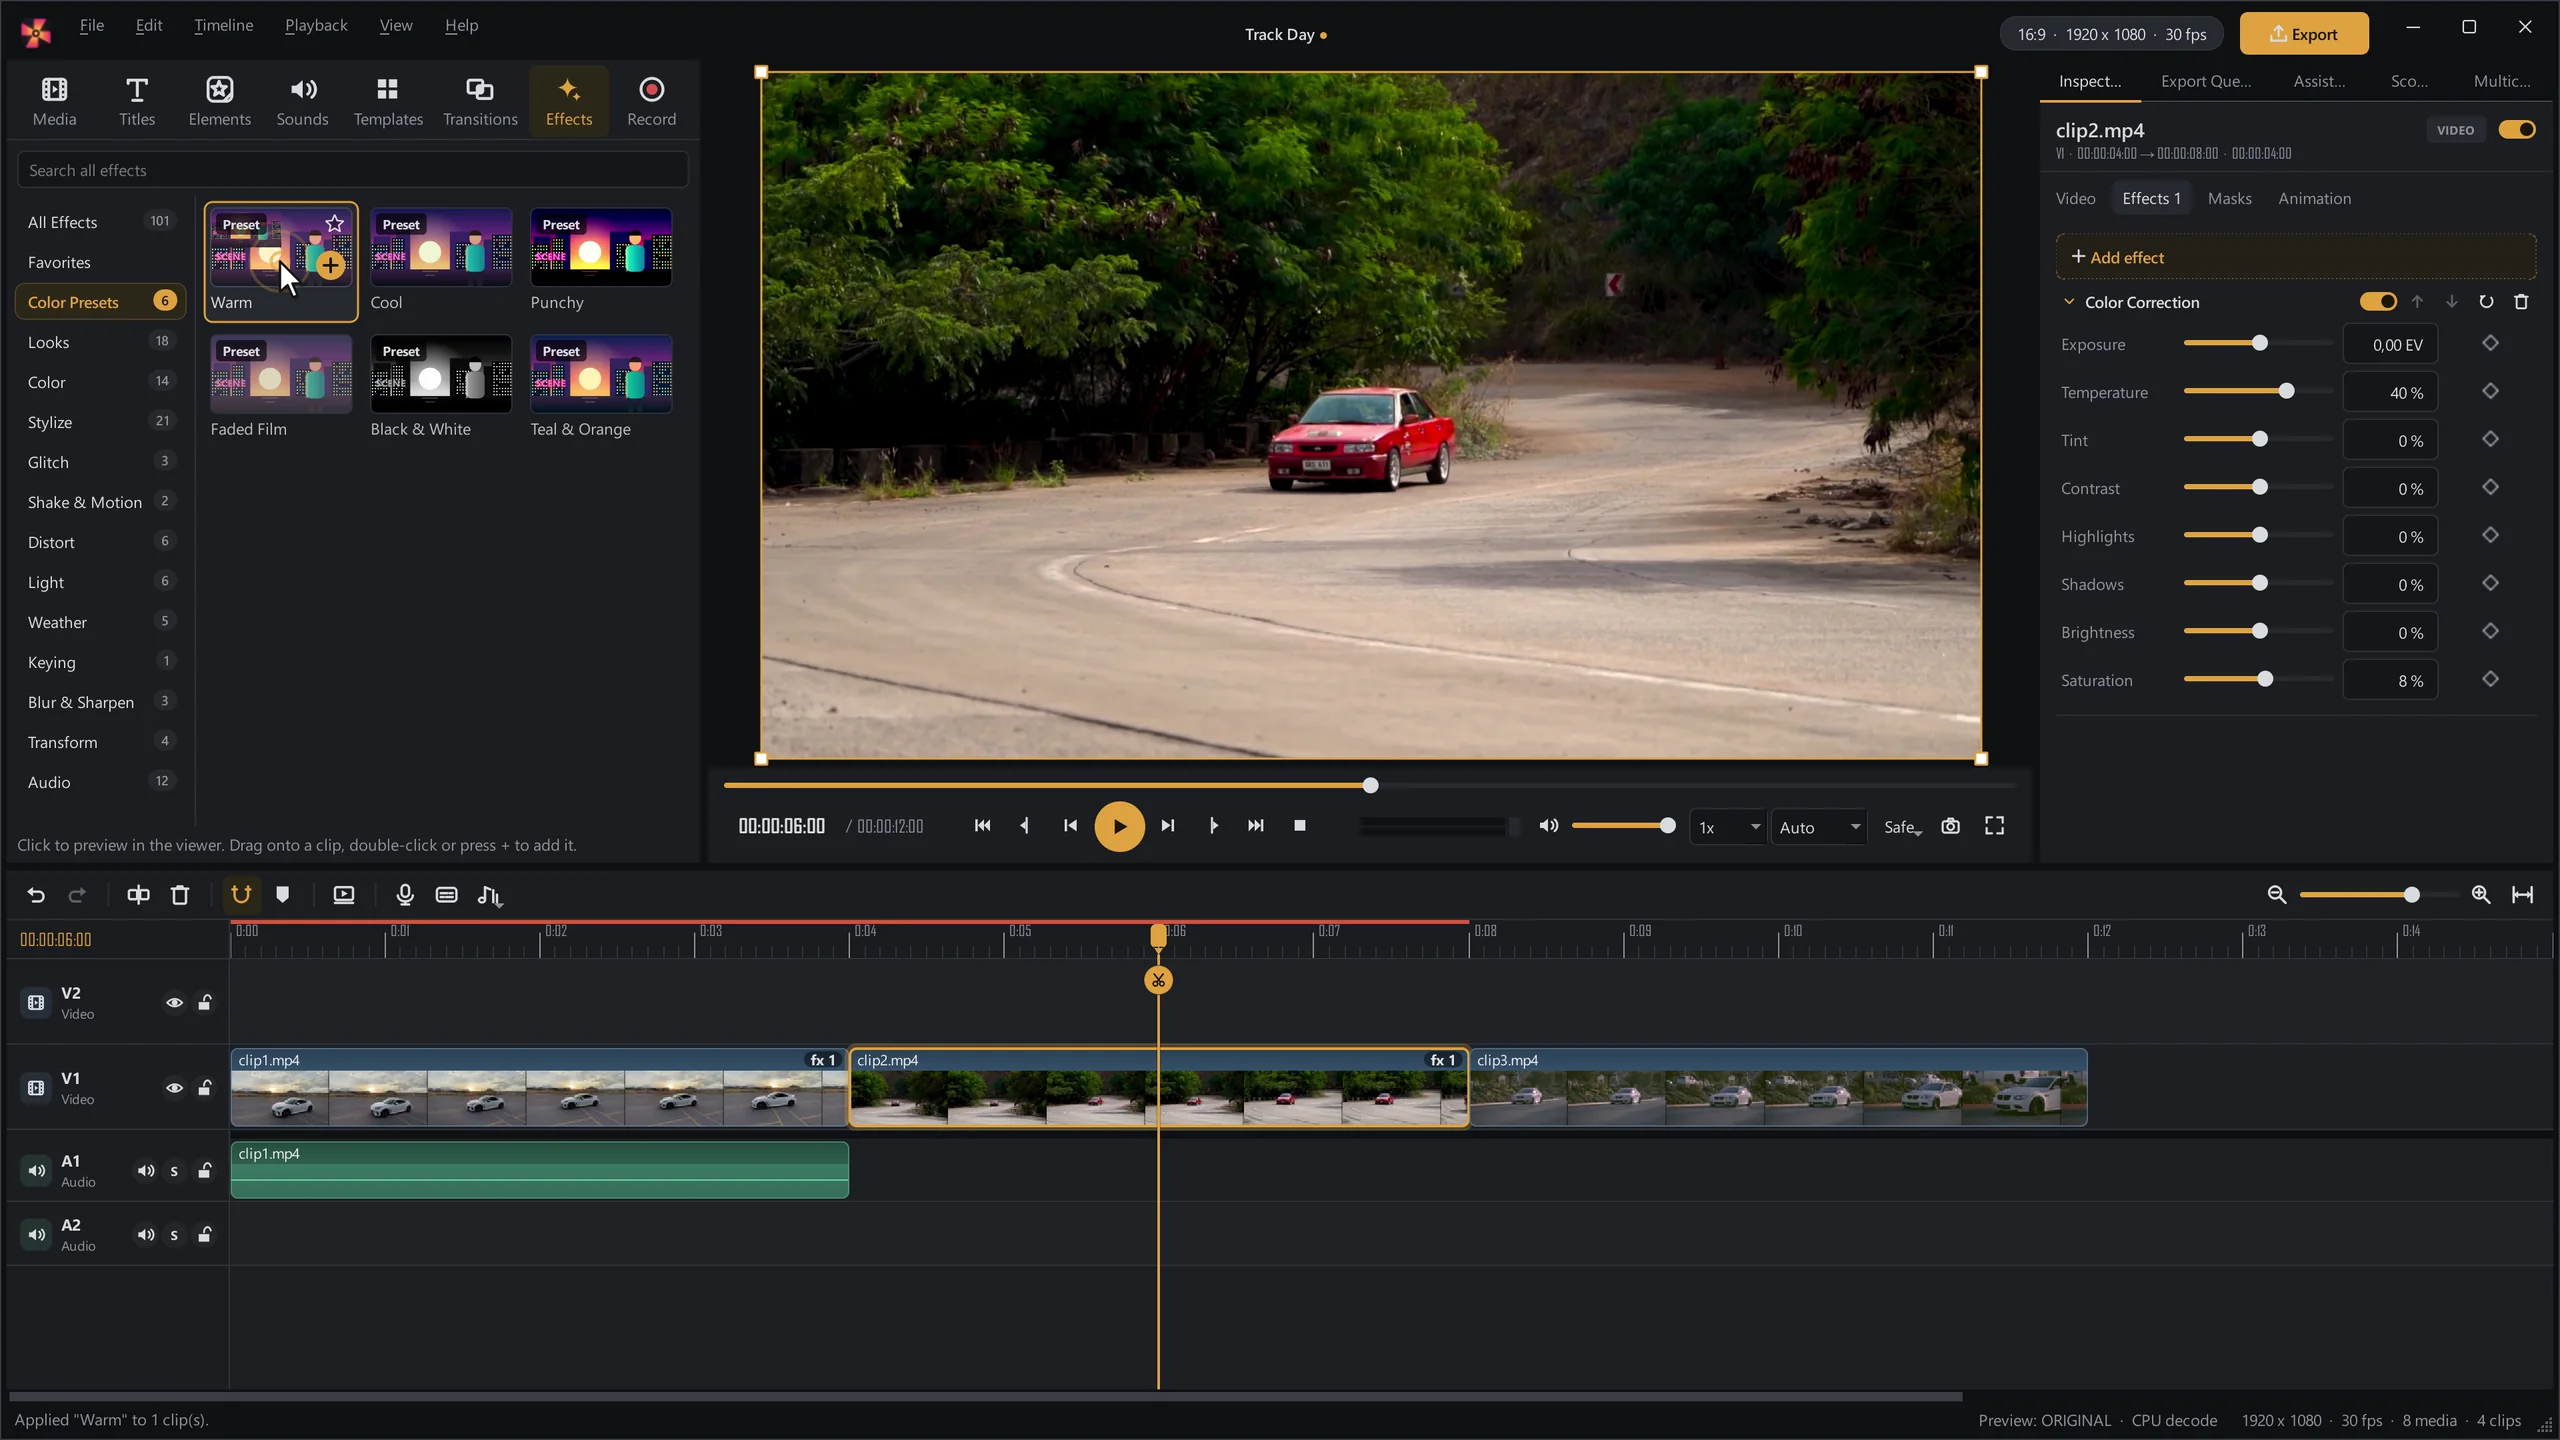
- Under Color Presets one click gives a clip a finished look
- Ctrl + Shift + C copies a clip's grade, Ctrl + Shift + V pastes it onto others
Animate
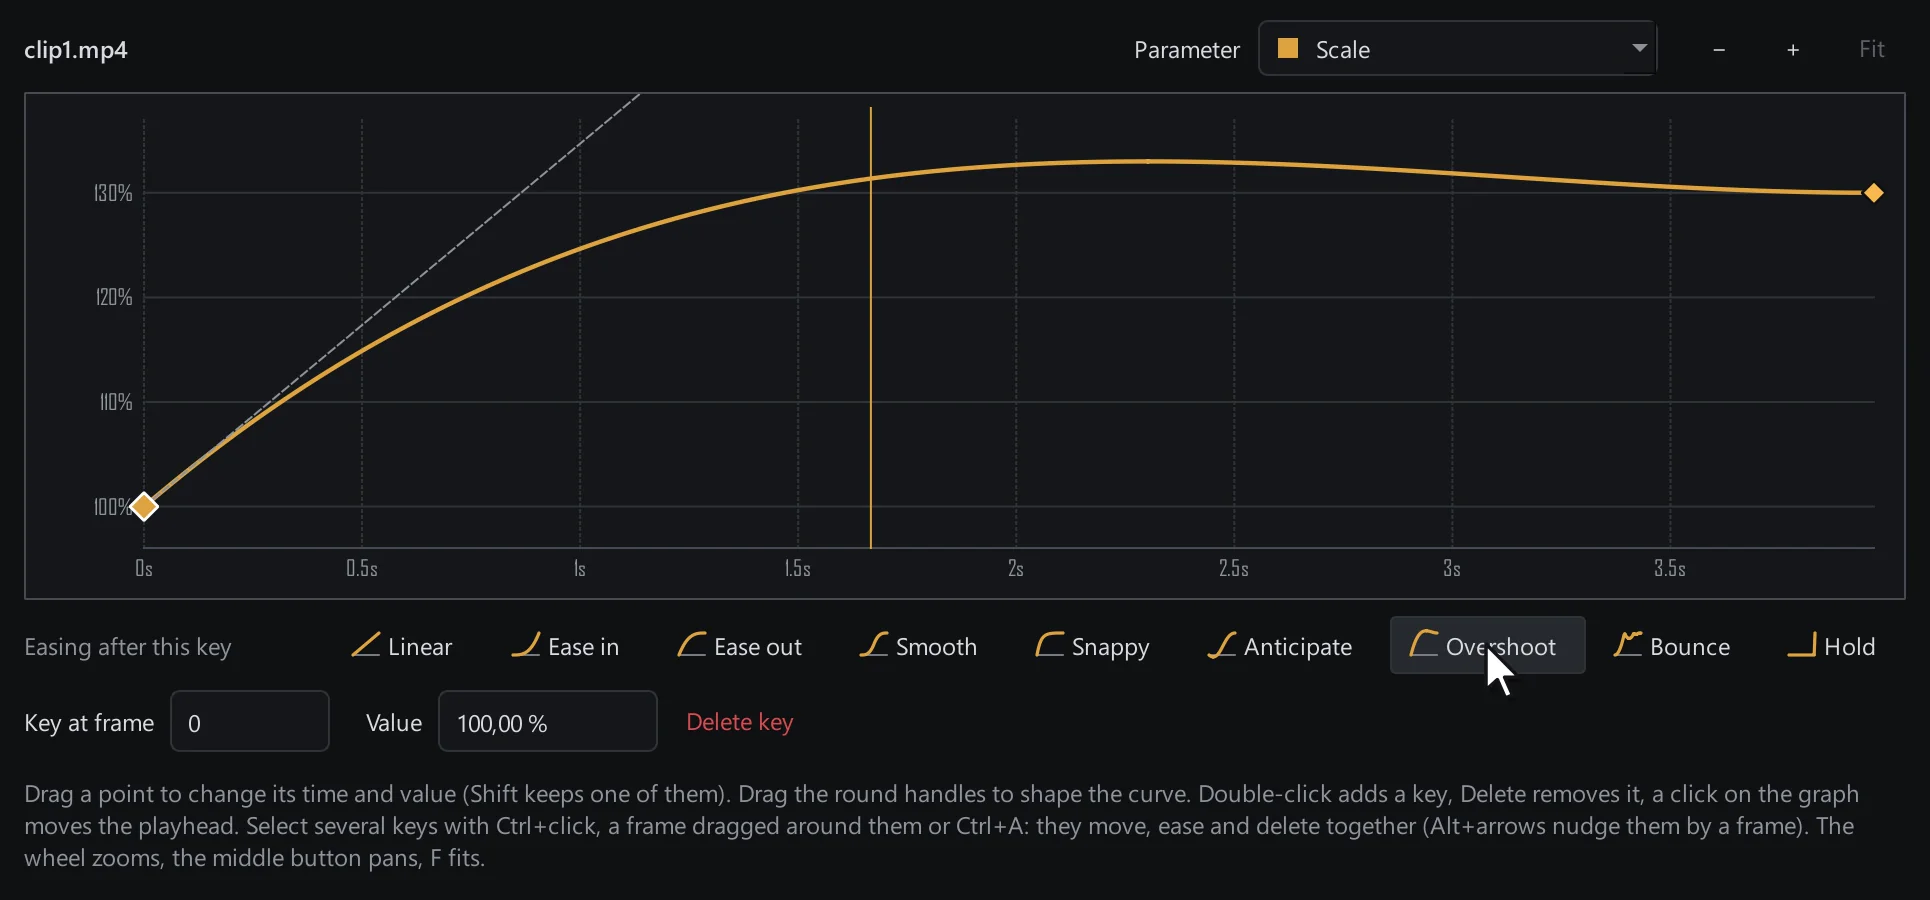
Select a clip and open Animation in the inspector. Ken Burns, zooms and pans move the whole clip; In and Out let it fade, slide or pop. For anything else, click the diamond next to a slider to set a keyframe, move the playhead and change the value.
Sound
The Sounds tab holds 80 sounds: click one to hear it, drag it onto an audio track. Select any audio clip to set volume, fades and speed in the inspector, or to remove noise.
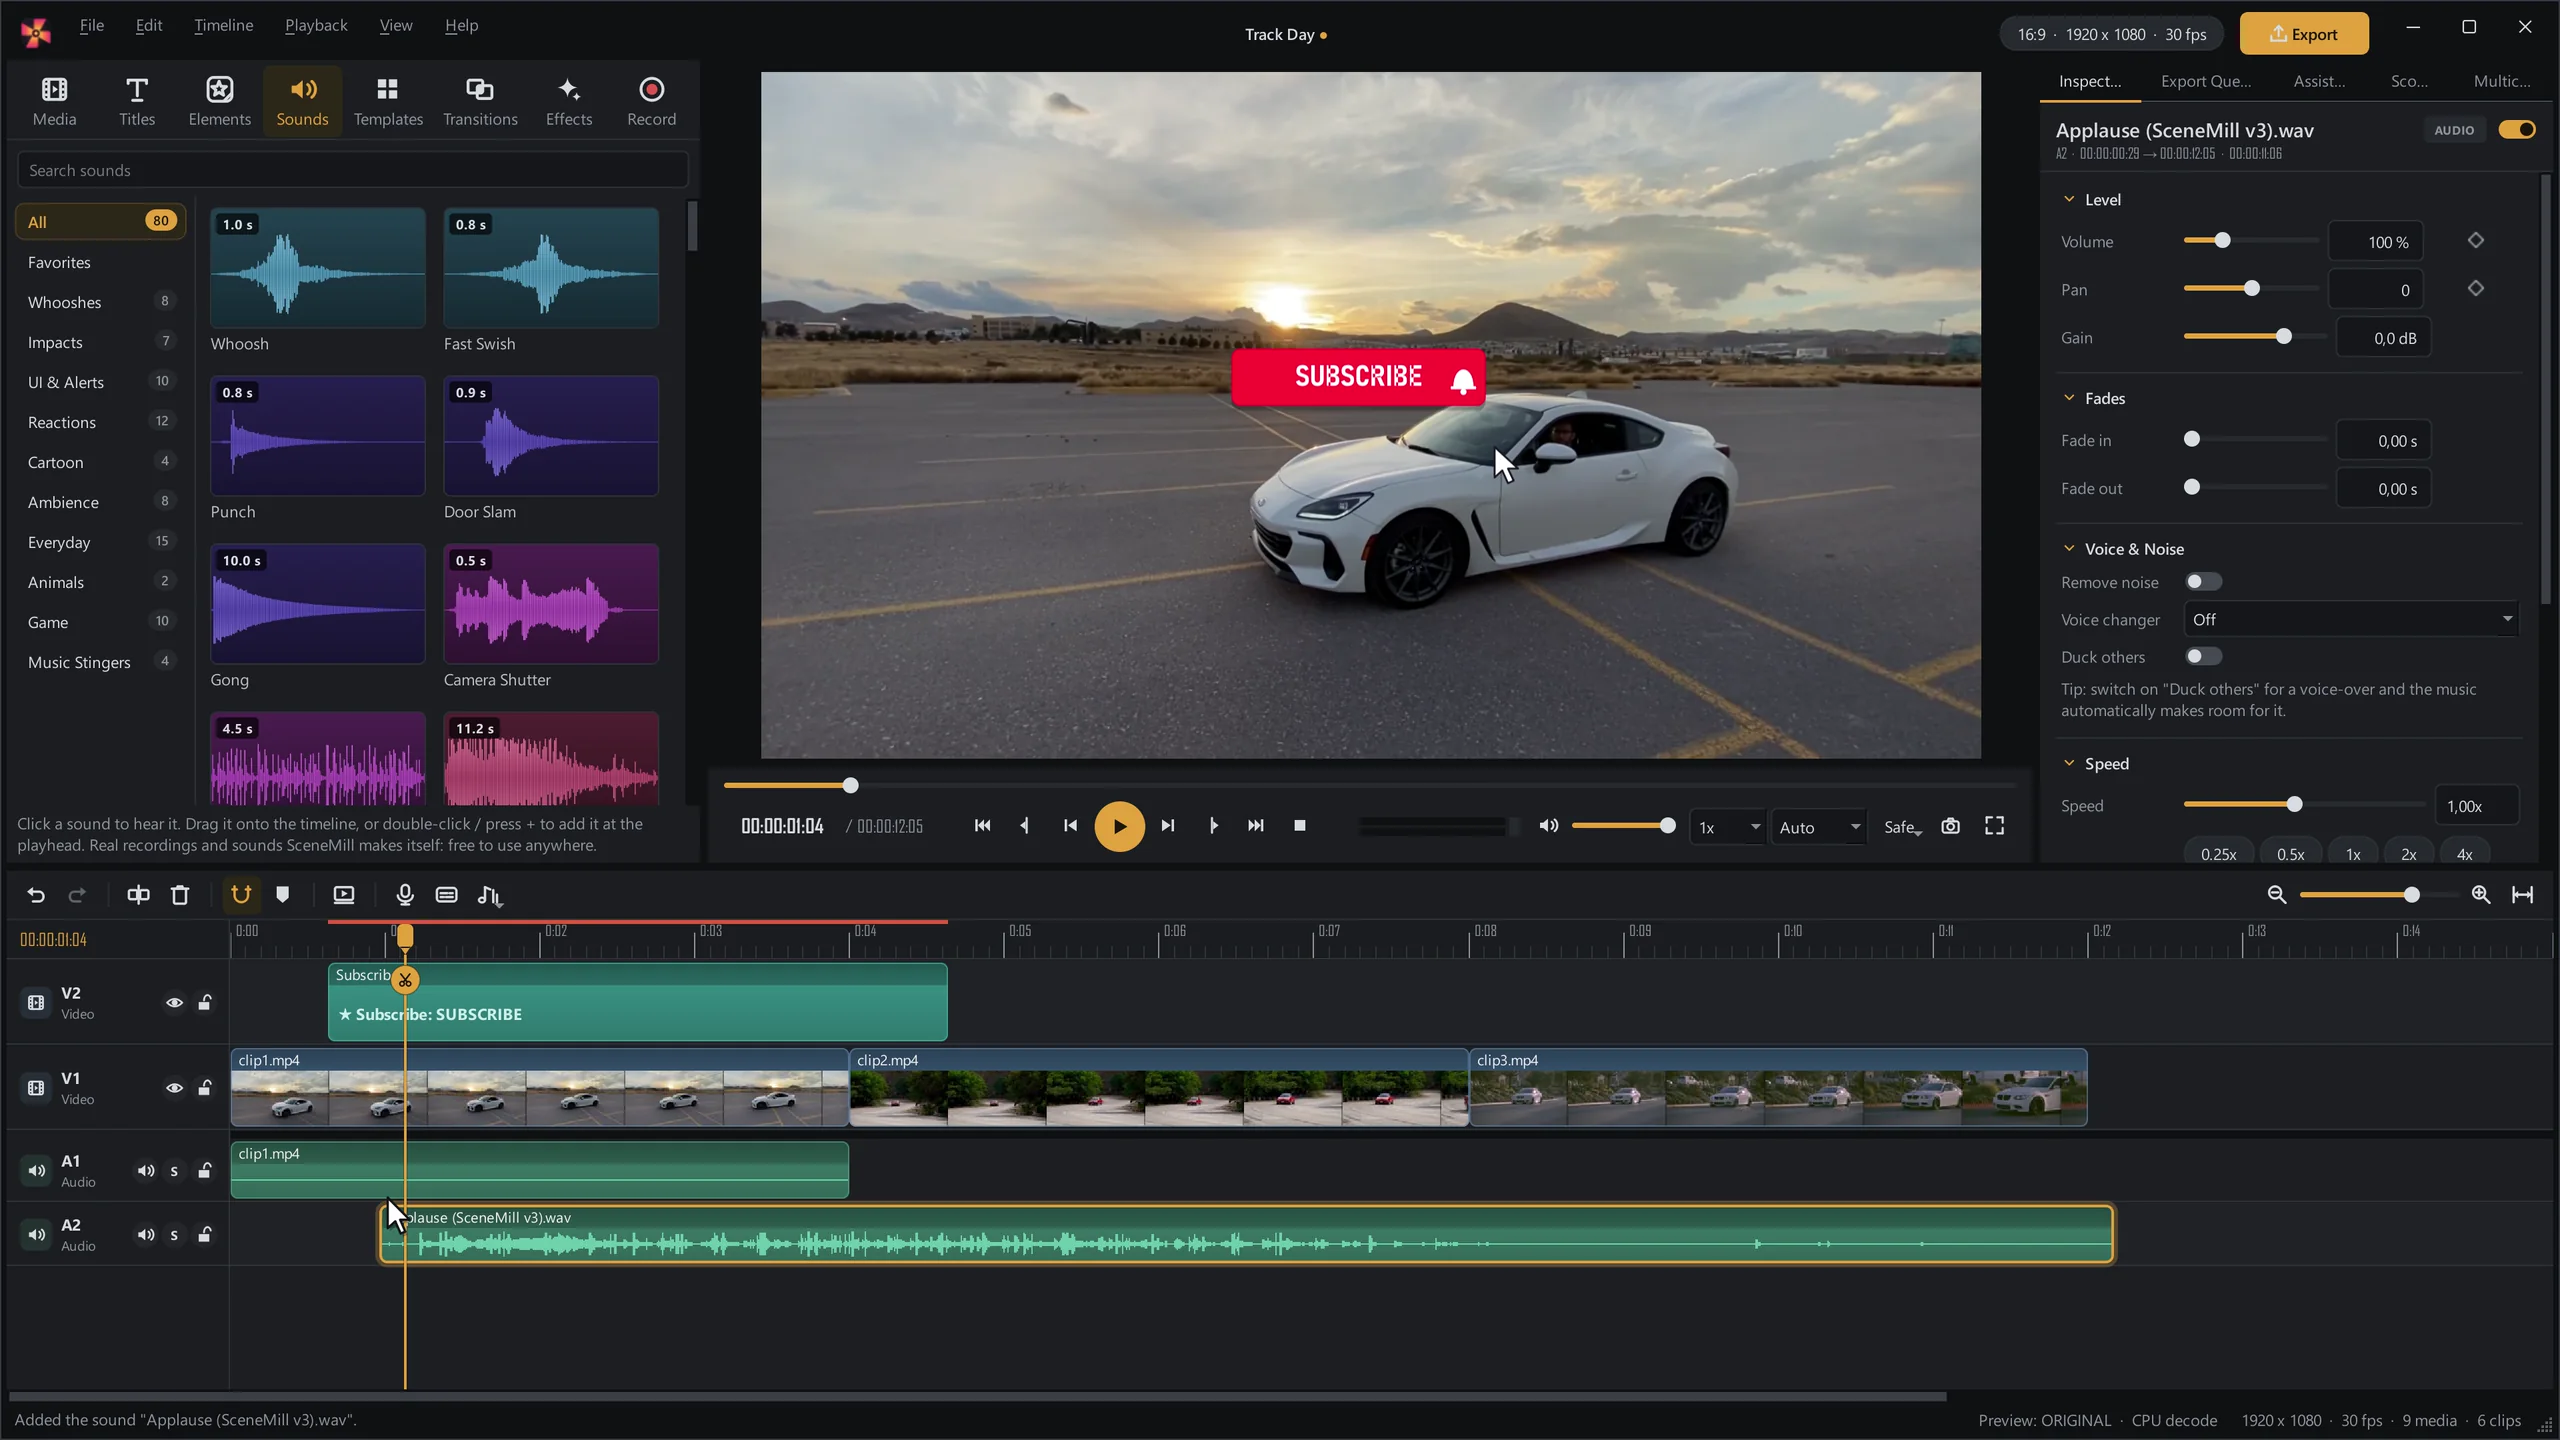
- Ctrl + Alt + R records a voice-over at the playhead
- Switch on Duck others on the voice-over and the music makes room for it
Export
Click Export at the top right (Ctrl + E). Under Made for, pick where the video goes: YouTube, Shorts, TikTok, Reels and more. SceneMill sets format and size. Choose where to save and click Export, or Add to Queue to keep editing while it renders.
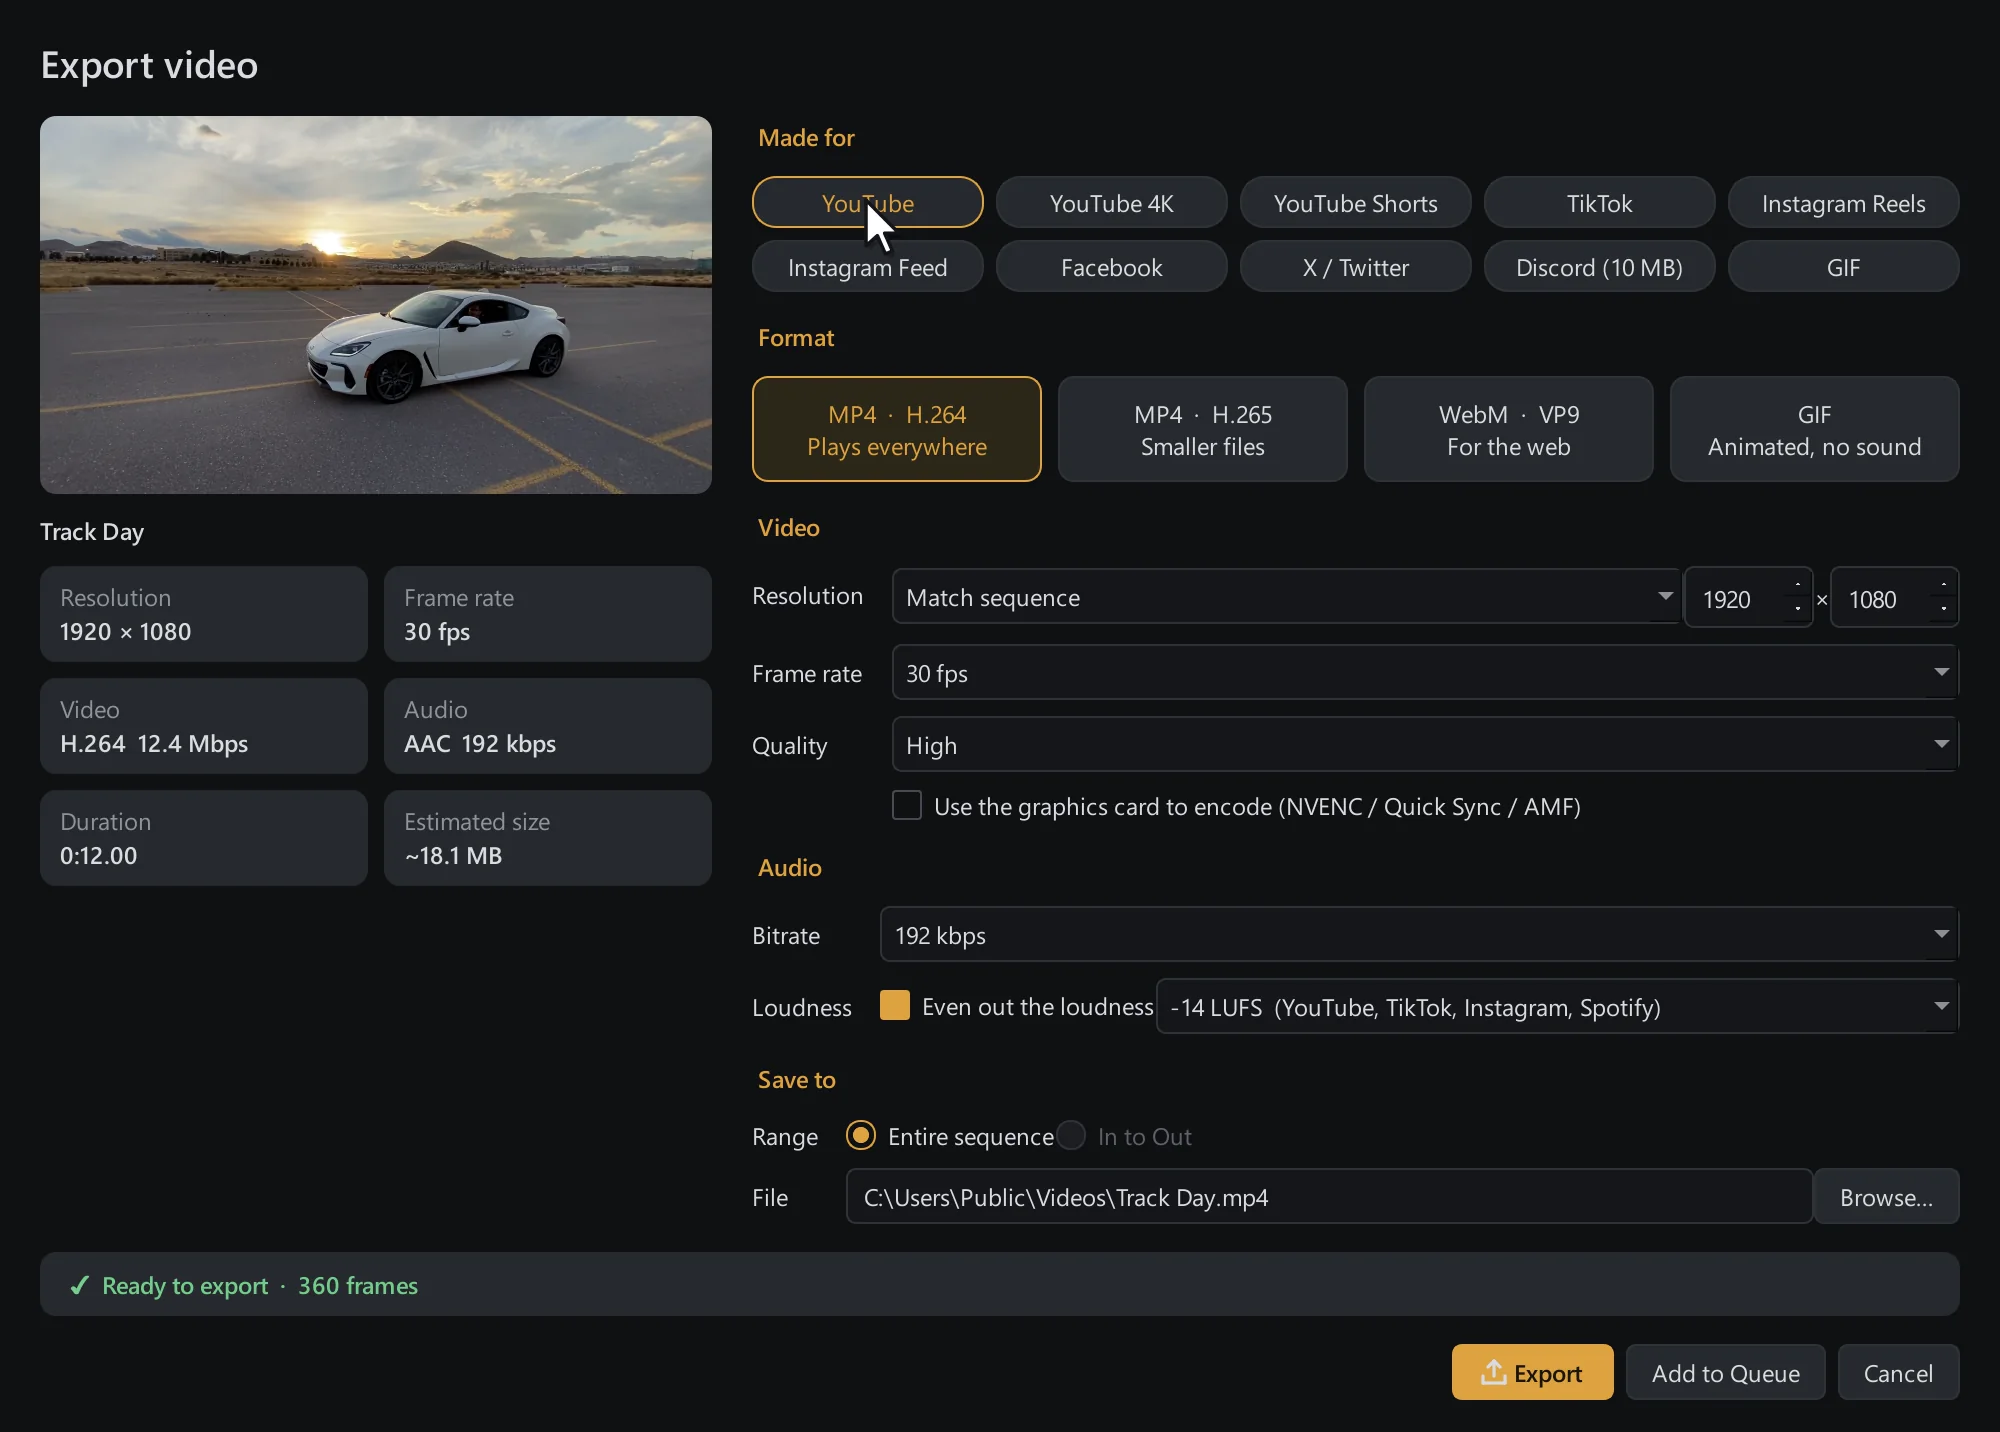
“Even out the loudness” brings the sound to the level the platforms expect.
Keyboard shortcuts
The defaults. Change any of them under Edit › Keyboard Shortcuts.
| Space | Play / pause |
|---|---|
| J K L | Reverse / pause / forward |
| ← → | Previous / next frame |
| Shift + ← → | 10 frames back / forward |
| ↑ ↓ | Previous / next cut |
| Home End | Start / end |
| Ctrl + K | Split at the playhead |
|---|---|
| Delete | Delete, leaving a gap |
| Shift + Delete | Delete and close the gap |
| Ctrl + Z | Undo |
| Ctrl + Shift + Z | Redo |
| Ctrl + L | Link clips |
| Shift + E | Enable / disable a clip |
| = - \ | Zoom in / out / fit |
|---|---|
| N | Snapping on / off |
| M | Add a marker |
| I O | Set In / Out point |
| Alt + X | Clear In / Out |
| T | Add a title |
| Shift + T | Add a subtitle |
| Ctrl + D | Cross dissolve at the nearest cut |
| Ctrl + I | Import media |
|---|---|
| Ctrl + E | Export |
| Ctrl + Shift + S | Save project as |
| Ctrl + Shift + R | Record the screen |
| Ctrl + Alt + R | Record a voice-over |
| Ctrl + Shift + C / V | Copy / paste a grade |